Reading Time: 20 minutes
Difficulty Level: Intermediate
Tools Needed: Wireshark (Free), Laptop
Series: Cybersecurity 101: Part 2 (Evil Twin)
Introduction: The Digital X-Ray
Introduction: The Digital X-Ray
Welcome to the ultimate guide on Wireshark for beginners. In the previous parts of our Cybersecurity series, we talked about invisible threats. We discussed how hackers create Evil Twins and how networks leak data. But for many everyday users, this sounds like abstract theory.
Today, we stop imagining. Today, we are going to look at the matrix code itself and see exactly what hackers see when they intercept your traffic.
We are going to use a tool called Wireshark. It is the world’s most popular network protocol analyzer. Think of it as a digital X-ray machine. When you turn it on, it captures every single packet of data flying through the air or wire—every email, every photo, every password.
Warning:
This tutorial is for educational purposes only. Intercepting traffic on a network you do not own or have permission to audit is a crime (Wiretapping) in most jurisdictions. We will perform this analysis on our own device to demonstrate the vulnerability of HTTP protocols.
By the end of this guide, you will see with your own eyes why browsing without a VPN is like writing your passwords on a postcard.
Why Learning Wireshark for Beginners is Crucial Today
Many people assume that network analysis is only for advanced IT professionals or hackers in hoodies. This is a dangerous misconception. Understanding Wireshark for beginners is the most practical step you can take to truly comprehend your digital footprint. Once you see your own data exposed in plain text, you will never look at public Wi-Fi the same way again. Mastering Wireshark for beginners bridges the gap between blindly trusting your cybersecurity tools and actually verifying them with your own eyes.
Part 1. What is Wireshark?
Before we download anything, you need to understand what you are looking at.
The internet isn’t a continuous stream of data like water in a pipe. It’s more like a traffic jam of millions of tiny cars. These cars are called Packets.
- When you send an email, it gets chopped up into thousands of packets.
- These packets travel independently across the world.
- They reassemble on the recipient’s computer.
Wireshark puts a checkpoint on the road. It stops every car (packet), opens the trunk, inspects the cargo (data), and logs it.
Why do hackers love it?
Hackers don’t need to “break” encryption to steal data if you aren’t using encryption. If you are on an open Wi-Fi network and visit a website that uses HTTP (not HTTPS), your data is sent in Plain Text.
Wireshark simply reads it.
Part 2. Setting Up the Lab
Let’s get your hands dirty. We need to install the software.
Step 1: Download Wireshark
Go to the official website: wireshark.org.
- Windows: Download the Windows Installer (64-bit).
- macOS: Download the disk image (.dmg).
- Linux: It’s usually available in your repository (
sudo apt install wireshark).
Note on Installation: During installation on Windows, it will ask to install Npcap.
- CHECK THIS BOX. Npcap is the driver that allows your network card to enter “Promiscuous Mode” (more on that later). Without it, Wireshark is blind.
Step 2: The Interface
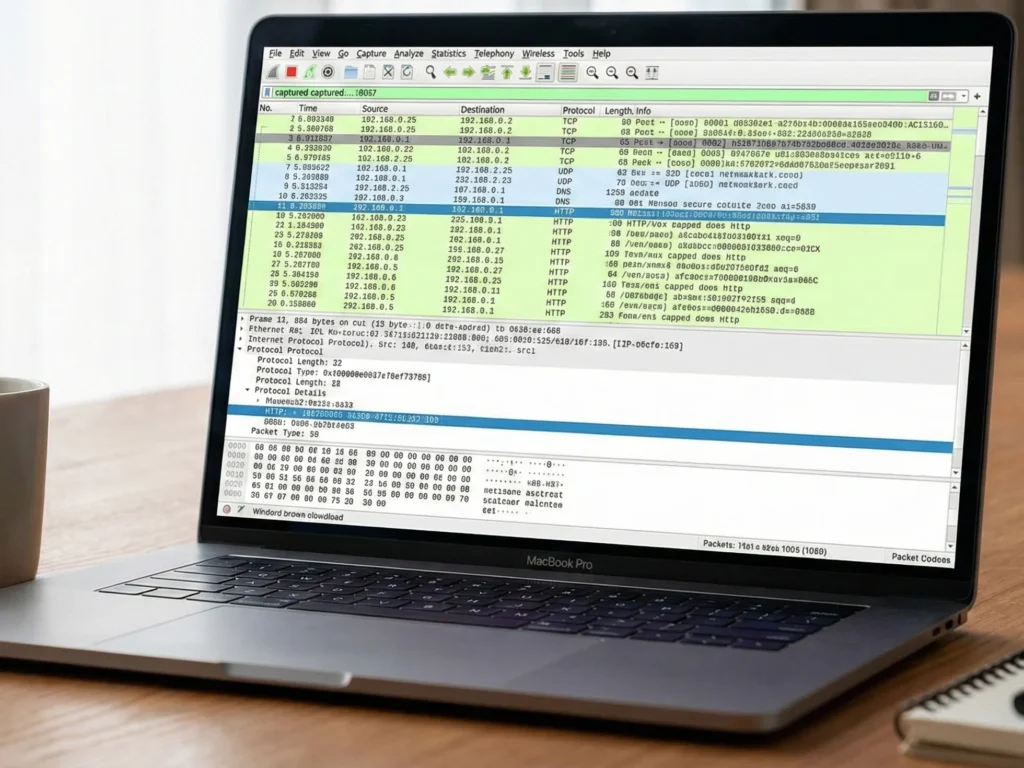
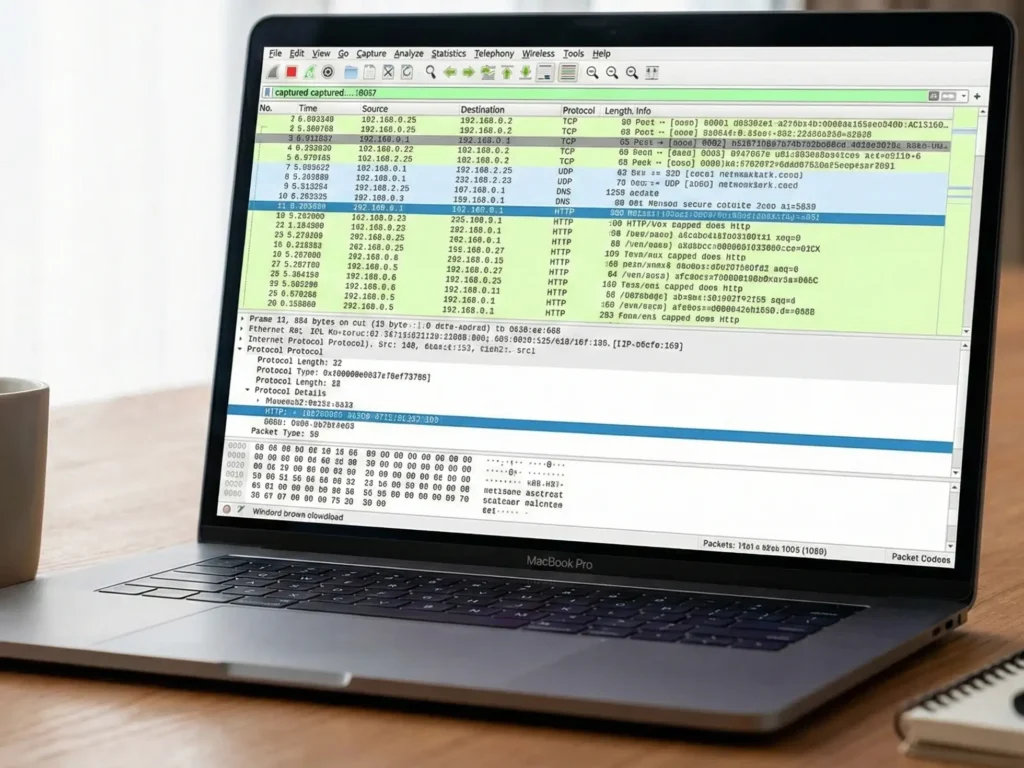
When you open Wireshark, it looks intimidating. It looks like the dashboard of a spaceship. Don’t panic. There are three main panes:
- Packet List (Top): The list of all captured packets. Each row is one packet.
- Packet Details (Middle): The hierarchical view of the selected packet (OSI layers).
- Packet Bytes (Bottom): The raw hexadecimal data (The Matrix code).
Part 3. The Experiment: Capturing Your First Password
To demonstrate the danger, we need a target. DO NOT use your real banking password.
We will use a designated testing website created for security professionals: http://testphp.vulnweb.com/login.php.
(Note: This site intentionally uses HTTP so people can test scanners).
Step 1: Select Your Interface
On the Wireshark welcome screen, you will see a graph of traffic.
- If you are on Wi-Fi, select Wi-Fi (or
wlan0). - If you are on a cable, select Ethernet (or
eth0).
Double-click the interface (the shark fin icon turns blue). The capture has started.
You will immediately see colorful lines scrolling rapidly. This is the live internet traffic of your computer.
Step 2: Generate the Traffic
- Open your browser.
- Go to
http://testphp.vulnweb.com/login.php. - Crucial: Notice the browser says “Not Secure” in the address bar.
- In the Username field, type:
AdminUser. - In the Password field, type:
MySecretPassword123. - Click Login.
Step 3: Stop the Capture
Go back to Wireshark. Click the red square Stop button in the top left corner.
You now have thousands of packets. Your password is in there somewhere. Finding it is like finding a needle in a haystack.
When you first look at the massive wall of scrolling colors and hexadecimal numbers, it is easy to feel overwhelmed. However, the secret to mastering Wireshark for beginners lies entirely in one specific feature: display filters. You do not need to read every single line of code. By using simple text commands, Wireshark for beginners transforms from a chaotic matrix of data into a neatly organized list of exactly what you want to see.
Part 4. The Art of Filtering
This is where the magic happens. Wireshark has a powerful filtering language.
Filter 1: Isolate HTTP
In the filter bar at the top (where it says “Apply a display filter”), type:
http
Press Enter.
Now, all the background noise (Windows updates, Zoom calls, Spotify music) is gone. You only see web traffic.
Filter 2: Find the “POST” Request
When you load a page, you use a GET method (you “get” data).
When you send a password or fill out a form, you use a POST method (you “post” data to the server).
Modify your filter to look like this:
http.request.method == “POST”
Press Enter.
You should now see only one or two packets in the list. This is the moment your computer sent the credentials.
Part 5. The Reveal: Seeing the Password. Wireshark for Beginners.
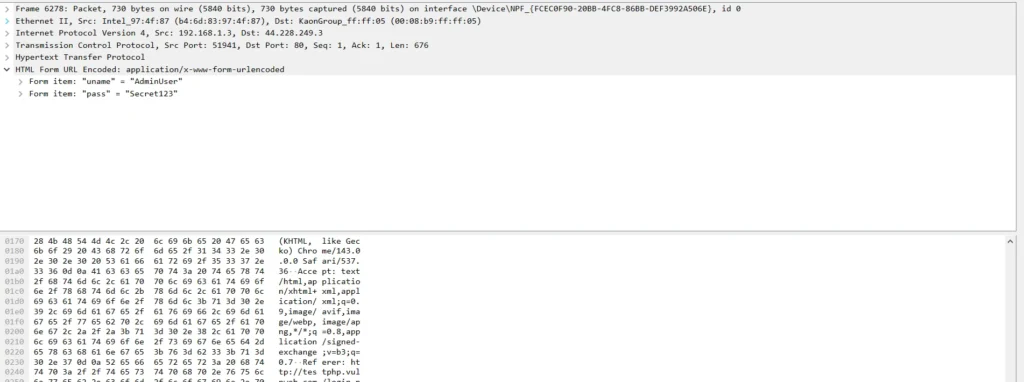
- Click on the packet that says
POST /userinfo.php HTTP/1.1. - Look at the Packet Details pane (the middle one).
- Scroll to the very bottom. You will see a section called HTML Form URL Encoded: application/x-www-form-urlencoded.
- Click the small arrow
>to expand it.
And there it is.
You will see fields like:
uname: AdminUserpass: MySecretPassword123
Congratulations. You just sniffed a password.

What just happened?
Because the website used HTTP instead of HTTPS, your browser put your password in a digital envelope without sealing it.
Anyone listening on the network—the guy in the coffee shop, the Evil Twin hacker, or the rogue System Admin—could read it just as easily as you just did.

Part 6. “But I use HTTPS!” (Why you are still not safe)
You might be thinking: “Okay, but Google and Facebook use HTTPS. My data is encrypted, so Wireshark can’t see it, right?”
Let’s test it.
The HTTPS Test
- Start a new capture.
- Go to
https://www.google.com. - Stop the capture.
- Filter by
tcp.port == 443(the standard HTTPS port).
Click on any packet and look at the “Packet Bytes” at the bottom.
You won’t see text. You will see random characters: a3 f4 9b 12….
This is TLS Encryption. Wireshark cannot read the content.
HOWEVER. The Danger Remains.
Even with HTTPS, Wireshark (and hackers) can see:
- DNS Queries: Before the encryption starts, your computer asks “Where is []?”. This request is often unencrypted.
- Server IP: They know exactly which server you are talking to (e.g., an OnlyFans server, a gambling site server, or a political forum server).
- Timing and Size: By analyzing how much data you download and when, advanced AI algorithms can guess what video you are watching (traffic fingerprinting).
And remember Part 2 of our series (The Evil Twin)?
If a hacker uses SSL Stripping, they can force your browser to downgrade from HTTPS to HTTP. In that case, Wireshark sees everything again.
Part 7. How to Blind Wireshark with a VPN. Wireshark for Beginners.
Now, let’s look at the ultimate defense.
We are going to run the exact same experiment, but this time with NordVPN enabled.
The Experiment with VPN
- Open NordVPN and connect to any server (e.g., Germany).
- Start Wireshark capture.
- Go to the HTTP test site (
testphp.vulnweb.com) and login again. - Stop Wireshark.
The Result
Try to use your filter: http or http.request.method == "POST".
The result: Empty.
Wireshark shows… nothing.
Why?
Because now, your network adapter is not talking to the website. It is talking to the NordVPN Server.
Remove the filter and look at the raw traffic. You will see thousands of packets using the WireGuard or OpenVPN protocol.
Inside the packet details, the data is completely scrambled.
- HTTP Site? Encrypted.
- DNS Lookup? Encrypted.
- IP Address? Hidden (It only shows you talking to the VPN IP).
The Tunnel Concept
Think of a VPN as a lead pipe inside a glass tunnel.
- Without VPN: Data travels through the glass tunnel. Wireshark is looking through the glass.
- With VPN: Data travels through the lead pipe. Wireshark can see the pipe, but it has no idea what is flowing inside it.
Conclusion: Don’t Rely on Luck
Wireshark is a free tool. A 12-year-old can download it and watch YouTube tutorials on how to use it.
Public Wi-Fi is a battlefield. You have no way of knowing if the router is safe, if there is an Evil Twin nearby, or if a bored script kiddie is sniffing packets at the next table.
The only variable you can control is your own encryption.
By using a VPN, you render tools like Wireshark useless against you. You turn your data into digital noise that no hacker can decipher.
🛡️ Take Control of Your Privacy
Don’t wait until your passwords are leaked. Secure your connection now.
👉 Get NordVPN (-74% OFF) + 3 Months FREE
(Includes Threat Protection to block malware and ads).
Next Steps in Your Analytical Journey
You have just scratched the surface of network analysis. While this guide focused exclusively on Wireshark for beginners, the software has hundreds of advanced features, including VoIP call reconstruction and malware traffic analysis. However, the foundational skills you learned today—capturing traffic, applying filters, and reading packet details—are exactly what every cybersecurity analyst uses daily. Keep practicing these Wireshark for beginners techniques on your home network to see what your smart TVs, mobile apps, and IoT devices are secretly broadcasting behind your back.
Appendix: Wireshark Cheat Sheet for Beginners
If you want to practice analyzing your own network traffic (to check for leaky apps), here are the essential filters:
| Filter | What it does |
ip.addr == 192.168.1.55 | Shows traffic only for a specific device. |
http | Shows only unencrypted web traffic. |
dns | Shows what websites are being requested (Phonebook). |
tcp.port == 443 | Shows HTTPS traffic (Encrypted). |
http.request.method == "POST" | Shows data being sent (Login forms, uploads). |
frame contains "password" | Searches the content of packets for the word “password”. |